🗣
카카오톡 프로필 클론하기 - html, css
December 23, 2021
카카오톡 프로필 클론하기
1. 개요
대한민국에서 가장 많이 사용하는 메신저는 무엇일까? 나는 카카오톡 이라 생각한다. 친구 목록에서 친구들을 누르면 프로필 정보를 볼 수가 있다. 오늘은 그 페이지를 html과 css를 가지고 그대로 구현 해 보는 시간을 가졌다.
2. 구현
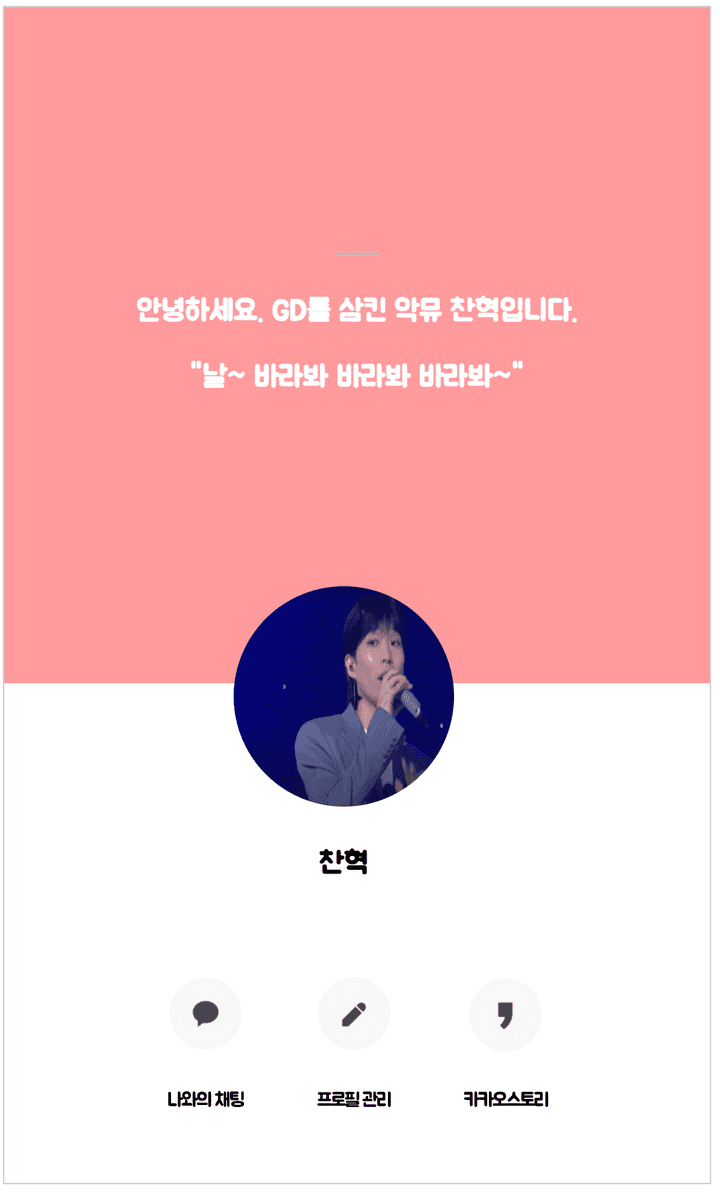
1️⃣ 처음 클론 하라는 이미지를 보았을 때 크게 세 부분으로 나누어야겠다 생각했다. 상단부(상태글), 중간부(프로필사진 및 이름), 하단부(3개의 버튼) 이렇게 말이다.
2️⃣ 1번에서 언급한 세 div를 한 div에 담아 display:flex로 세로로 정렬 시켰다. 그 중 중간부(프로필 사진 및 이름) 부분은 위,아래 사이에 겹쳐서 있어야 했기에, position:absolute를 사용했다.
3️⃣ 상단부 작은 회색 선(물체)은 button으로 구현했다. (튜터님을 통해 hr태그 있다는 걸 나중에 알았다.)
4️⃣ 하단부 버튼 3개 역시 display:flex로 가로로 정렬
5️⃣ (추가조건) em, rem, % 등 상대적 수치는 사용 불가, 오직 px로만 구현할 것
3. 코드
<!DOCTYPE html>
<html lang="en">
  <head>
    <meta charset="UTF-8" />

    <link
      href="https://fonts.googleapis.com/css2?family=Gaegu:wght@700&family=Jua&family=Song+Myung&display=swap"
      rel="stylesheet"
    />

    <title>카카오 프로필</title>
    <style>
      * {
        font-family: 'Jua', sans-serif;
      }
      .whole-body {
        width: 480px;
        height: 800px;

        background-color: aquamarine;

        border: 1px solid rgb(206, 206, 206);

        display: flex;
        flex-direction: column;
        justify-content: center;
      }
      .profile-top {
        height: 460px;
        position: static;
        text-align: center;
        background-color: rgb(255, 155, 157);
      }
      .gray-box {
        background-color: rgb(208, 180, 180);
        border-radius: 10px;
        border: none;
        width: 30px;
      }
      .profile-top > div {
        margin-top: 150px;
        color: white;
        font-weight: bold;
        font-size: 20px;
      }
      .profile-center {
        left: 165px;
        margin-top: 210px;
        position: absolute;
        text-align: center;
        font-weight: bold;
        font-size: 20px;
      }
      .profile-center > img {
        width: 150px;
        height: 150px;
        border-radius: 100px;
      }
      .profile-bottom {
        height: 340px;
        background-color: white;
      }
      .profile-bottom > div {
        margin-top: 200px;

        display: flex;
        flex-direction: row;
        justify-content: center;
        align-items: center;
      }
      .chat-myself {
        font-size: 13px;
        letter-spacing: -1px;

        display: flex;
        flex-direction: column;
        align-items: center;
      }
      .chat-image {
        background: url('chat_myself.png') no-repeat;
        background-size: 50px 50px;
        border: none;
        width: 50px;
        height: 50px;
        cursor: pointer;
        margin-bottom: 13px;
      }
      .manage-myprofile {
        font-size: 13px;
        letter-spacing: -1px;

        display: flex;
        flex-direction: column;
        align-items: center;
        margin: auto 50px auto 50px;
      }
      .mmp-image {
        background: url('manage_profile.png') no-repeat;
        background-size: 50px 50px;
        border: none;
        width: 50px;
        height: 50px;
        cursor: pointer;
        margin-bottom: 13px;
      }
      .kakaostory {
        font-size: 13px;
        letter-spacing: -1px;

        display: flex;
        flex-direction: column;
        align-items: center;
      }
      .ks-image {
        background: url('kakaostory.png') no-repeat;
        background-size: 50px 50px;
        border: none;
        width: 50px;
        height: 50px;
        cursor: pointer;
        margin-bottom: 13px;
      }
    </style>
  </head>
  <body>
    <div class="whole-body">
      <div class="profile-top">
        <div>
          <button class="gray-box"></button>
          <p>안녕하세요. GD를 삼킨 악뮤 찬혁입니다.</p>
          <p>"날~ 바라봐 바라봐 바라봐~"</p>
        </div>
      </div>
      <div class="profile-center">
        <img src="myprofile_photo.jpeg" alt="" />
        <p>찬혁</p>
      </div>
      <div class="profile-bottom">
        <div>
          <div class="chat-myself">
            <input type="button" class="chat-image" />
            <p>나와의 채팅</p>
          </div>
          <div class="manage-myprofile">
            <input type="button" class="mmp-image" />
            <p>프로필 관리</p>
          </div>
          <div class="kakaostory">
            <input type="button" class="ks-image" />
            <p>카카오스토리</p>
          </div>
        </div>
      </div>
    </div>
  </body>
</html>
4. 결과물

총평
- css 문법을 잘 알지 못하니까 계속 이것 저것 써보면서 하나 하나 구현했다. (시간이 많이 걸림) 풀스택 개발자로 가는 길은 너무나 멀고도 험하다.
- 하단부 버튼들 경우 같은 css를 적용 받게 되는데 같은 클래스로 묶어줘야 겠다는 생각을 못하고 각 각 따로 클래스를 부여했다. (시간 낭비, 반복적인 불필요한 코드 생성)
- 하단부 버튼들을
<input type=button>으로 하니까 html validator 에서 value값을 넣어야 한다고 지적을 당했다. - 나는 오늘도 한걸음 걷는다.